How To Repair Wicker Furniture

How To Repair Wicker Furniture

[lwptoc]

Want to know how to repair wicker furniture? If you need to repair wicker furniture when the wicker reed is missing or broken and you’re seeking for someone to do it for you, you’re in for a surprise. Finding someone who is competent and willing to assist you will be tough, to say the least, and the cost will almost certainly be exorbitant if you have major damage. In certain situations, the repair may be more expensive than the worth of the furniture. In such case, you should consider fixing it yourself. If the piece of furniture is part of a matched set or merely one you truly enjoy, you should probably try to mend it rather than replace it. In such a scenario, it is fair to repair it yourself and rescue your damaged piece from the scrap heap. It’s time-consuming, but it’s worthwhile and attainable.

You Might Need These Tools

  • Pliers (Traditional)
  • Pliers with Needle Nose
  • Wire Cutters
  • Wire with the tensile strength of a paper clip

How To Repair Wicker Furniture: Reed Replacement for Missing or Damaged Wicker Furniture

Repairing wicker furniture seems difficult, and in some situations it is. This course, on the other hand, focuses on repairing lost or broken reed that is weaved in one direction and is not designed for very complex woven portions. Small repairs are simple, and performing them yourself may be a satisfying experience. It’s not awful once you get the hang of it, but it does need some patience.

10-Step Procedure for Replacing a Missing or Damaged Reed

1. Locate the Damaged Reed

The first step in how to repair wicker furniture is to examine the damage that has to be repaired, and determine whether re-weaving would suffice. Determine the extent of the damaged or missing wicker reed if it is easily visible. You should have a clear idea of what repairs are required.

2. Determine Reed Material: Shape, Size, and Color (Resin or Natural Reed)

To prepare for replacement, you must first determine the sort of material required, as well as the diameter and color of the reed. Wicker may be made from either natural or synthetic resins. Whether you use natural or resin reed, the style and size of the reed, as well as the colors, can vary.

3. If possible, get a sample of reed

To obtain the right replacement reed, you may need to collect a sample from the damaged reed or from a section of reed that has extra poking out from a hidden location beneath the furniture. If you can obtain a sample to show the vendor, you will have a greater chance of receiving the proper replacement or one that is near enough to be acceptable.

4. Determine the amount of reed required.

You’ll need to estimate how much (length) of each reed you’ll need to do the repairs. Make an educated guess and then add a bit extra. When placing your order, keep in mind that having leftovers is a good thing. Consider having a spare reed on hand before placing your order. If you need to make repairs again, it’s a low-cost insurance coverage.

5. Make contact with a wicker dealer and obtain a new reed.

In an attempt to obtain the identical reed, the first place to go for replacement reed is the store where you purchased the furniture. If it doesn’t work, you’ll need to contact a wicker dealer that can provide repair supplies. Natural wicker reed is very easy to obtain, but resin reed is more difficult to obtain due to the large number of merchants offering a variety of styles, sizes, and colors. Not all reeds can be replaced with an exact match, so you may have to settle for a different color or size. War wounds, in our experience, offer a little character to your furniture.

6. Observe and Record the Weave Pattern

Before you begin, you should familiarize yourself with the weave pattern. When you remove the damaged reed, you may not identify the pattern you need to duplicate when you wave in the new reed. So take a good look at it and figure out how to weave the new reed back in. It’s a good idea to look at the opposite side of the furniture (Example: left arm vs. right arm.) and see what it looks like in an area where there isn’t any damage or missing reed. Taking a clear photograph may also be beneficial.

7. Take out the damaged reed.

Using a pair of wire cutters or a similar instrument, cut and remove the damaged reed. Back out the remaining reed so that the end is pointing down and away from the surface. At least 1-2 inches of the original reed should be left tucked beneath the surface. The more you weave a piece of reed into place, the better it will hold. So, if possible, attempt to take enough original reed to weave back in a piece over and under the cross members at least four to seven times, more if desired. In limited spaces, you may be forced to utilize a brief weave over and under 2-3 cross members. In certain situations, you may have to accept that the new piece will be a little loose when you weave it in. However, as long as the braided piece does not come out, it is totally acceptable.

8. Create a wire tool to help you pull the reed back up.

When you’re ready to weave the new reed in place, you’ll need a tool to help you do it. The reed will be wrapped around and under the cross member. Without a wire tool to hook and draw up the reed, you will be unable to bring it back up to the surface. Make a wire tool out of a paperclip or similar sized wire so that when you feed the end of the cane down over a cross member, you can hold it with the wire and draw it up from beneath the subsequent cross member. Bend one end of the wire to make a hook large enough to grasp the reed and bring it back up to the surface. It may take some tinkering to get it to function the way you want it to. Keep the hook thin enough that it can draw the cane up and between the laterals. Bend the opposing end so that your finger has something to pull up on as you draw the reed up.

9. Insert the new reed by cutting and weaving it into place (Tuck In Ends Where Necessary)

New reed is typically sold in lengths more than 36 inches. This is generally longer than what is required to fix a single reed component. If possible, weave the entire length and then clip the excess off when you’re almost done to avoid wasting what you bought. If waste is not an issue or if the length is inconvenient, it may be simpler to cut lengths that are easier to deal with. Just don’t trim them too short or you’ll waste reed. Use the wire tool you created to assist you in weaving the reed into position. The tool includes a hook on the end that allows you to catch the end of the reed that is below the surface and draw it back up to complete the design.

Important note: Natural wicker reed must be soaked in water for at least 15 minutes before weaving to make it flexible enough to bend.

Natural Wicker Stain and Seal

If you’re mending a natural wicker item, you’ll need to stain or paint it to match the finish. If you’re staining rather than painting, seal the stained reed with a transparent acrylic paint after it’s stained and dried. If your wicker is natural and untreated, you won’t need to paint or protect it. Purchase the smallest amount of stain available at your local hardware store. For staining, follow the manufacturer’s directions. To seal the damaged area, get a can of acrylic spray clear coat and paint it. If you like, you may reseal the entire piece with the can.

If you need to paint the repair, you can do it either on the mended region or on the entire surface to provide an equal finish. For further information, see our Painting Wicker Furniture or Tips for Painting Wicker Furniture pages.

It’s critical to remember two things:

  1. Because the weaving motion consumes more reed than you may think, you’ll need more length than the linear distance between the start and conclusion of your weave.
  2. Allow at least 2 inches extra at the end of each side of the new reed so that it does not pull out when the final ends are tucked under the surface where they cannot be seen.
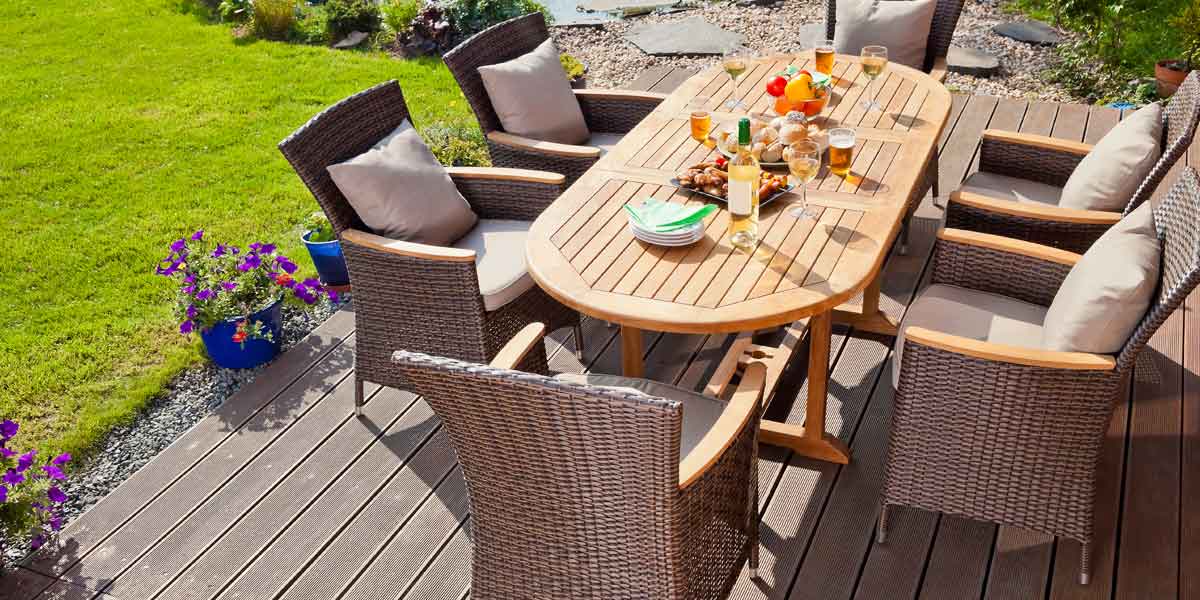
how to repair wicker furniture diy

Summary For How To Repair Wicker Furniture

After replacing each broken or missing reed, the weaving should be tight but not too slack. It is sometimes unavoidable to have a loose weave in a repair, although it is far preferable to be loose than damaged or absent. In most situations, you will have restored your wicker furniture successfully, and you will feel fairly good about yourself for learning how to fix it and being amazed at how wonderful it looks. Recognize that the replacement reed will typically survive the same amount of wear as the original.

Originally posted on October 6, 2021 @ 8:00 am
Basement  Find

Basement Find

Basement Find

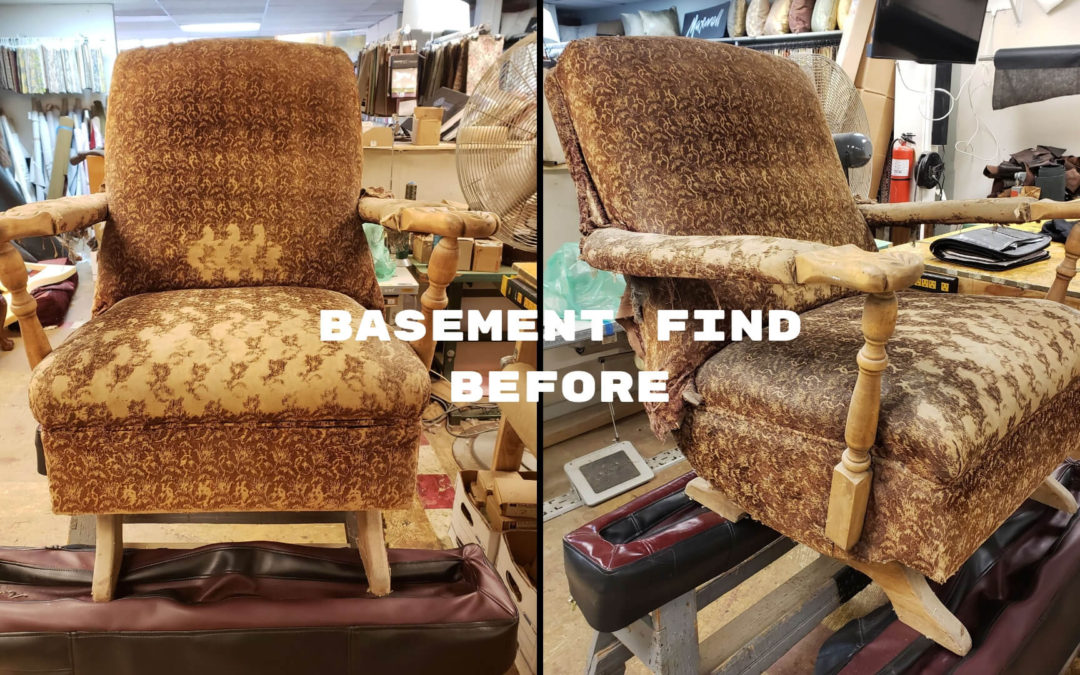
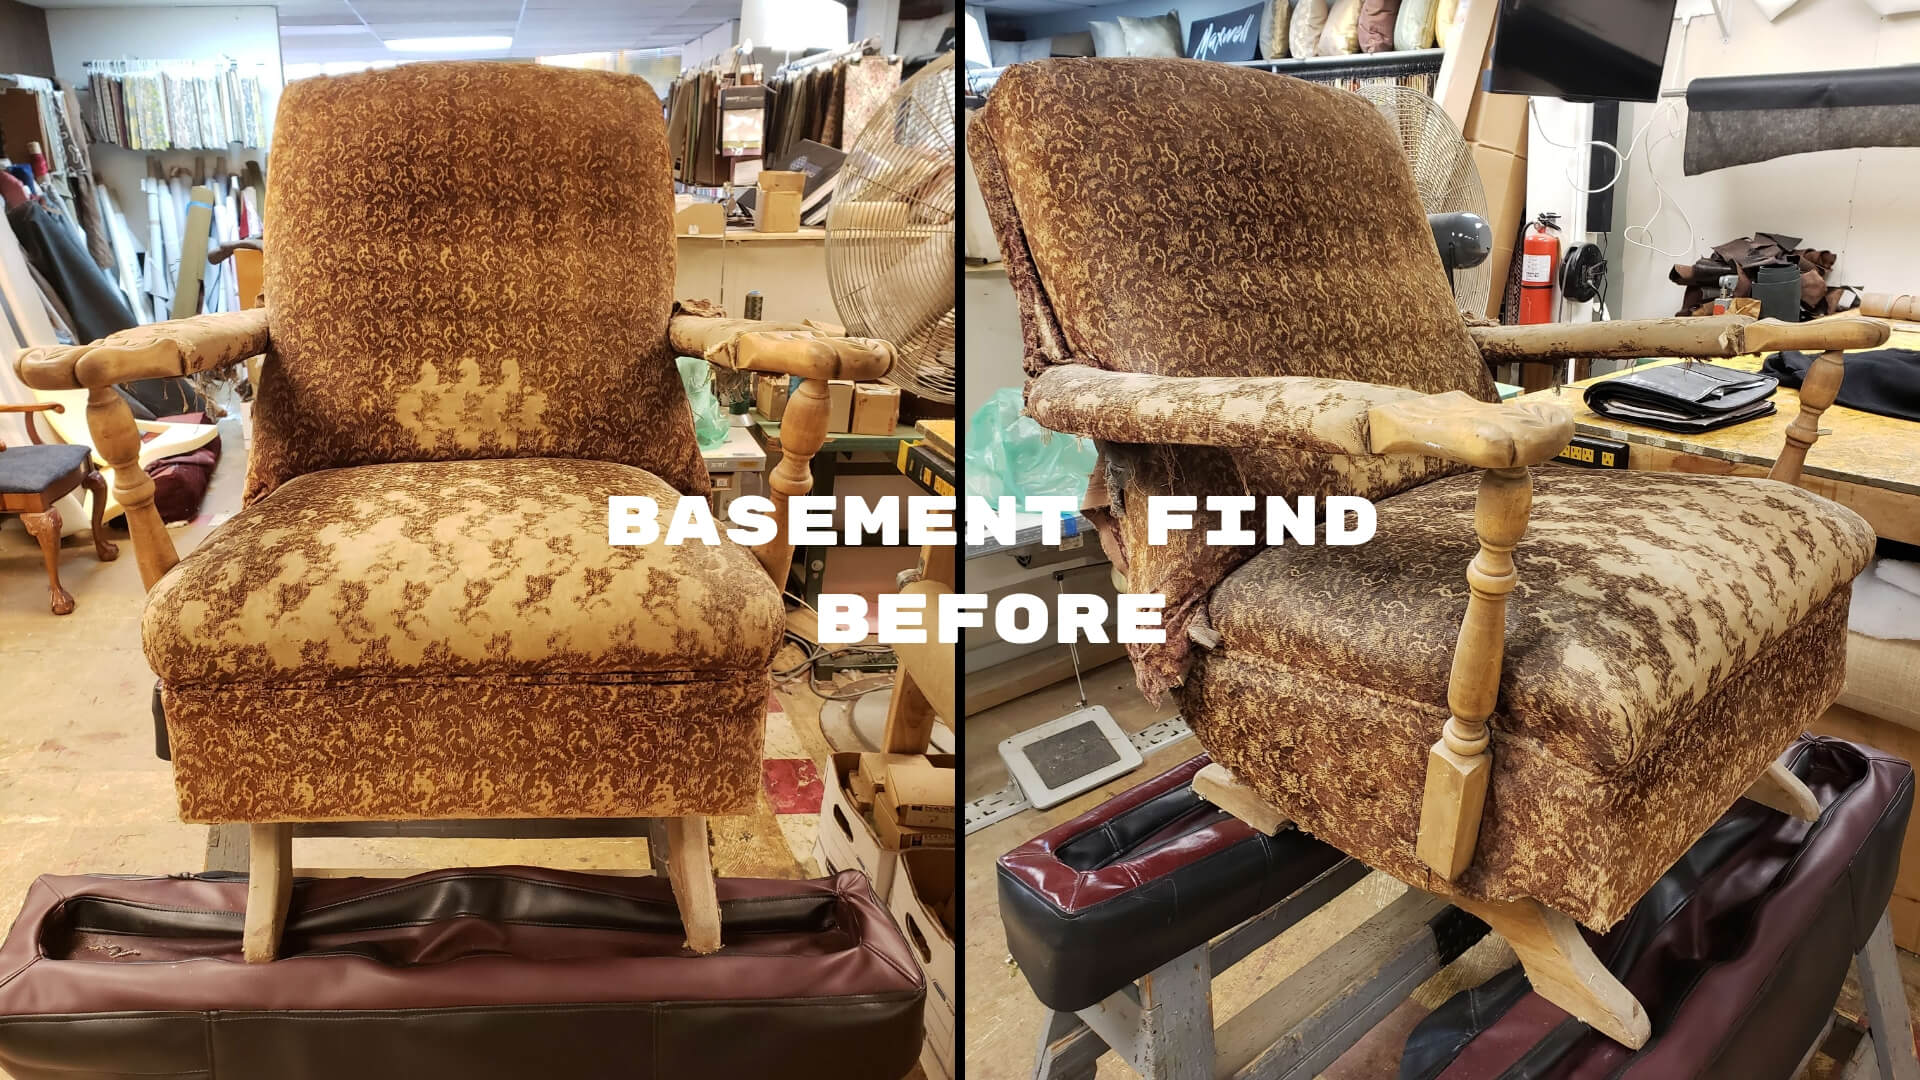
Basement find. A Client was looking for a chair for her daughter’s nursery room. She searched stores, but to no avail could not find a chair that she liked. We had just finished upholstering a different chair for her. She informed me she was looking for a chair with a solid frame, that was comfortable and that rocked. For her daughter, that was going to have a baby. In the basement of our shop we have vintage furniture that people were either going to burn or bring to the dump. Solid wood frames, vintage lines, furniture build better then anything today. I knew of just the chair that might be perfect. I brought her to where the chair was, showed her the chair in mind. A vintage platform rocker. She took photos, sent them to her daughter. They thought it would be perfect. A few days later she brought me the fabric she wanted on the chair. I brought it up from the basement and the restoration began. 

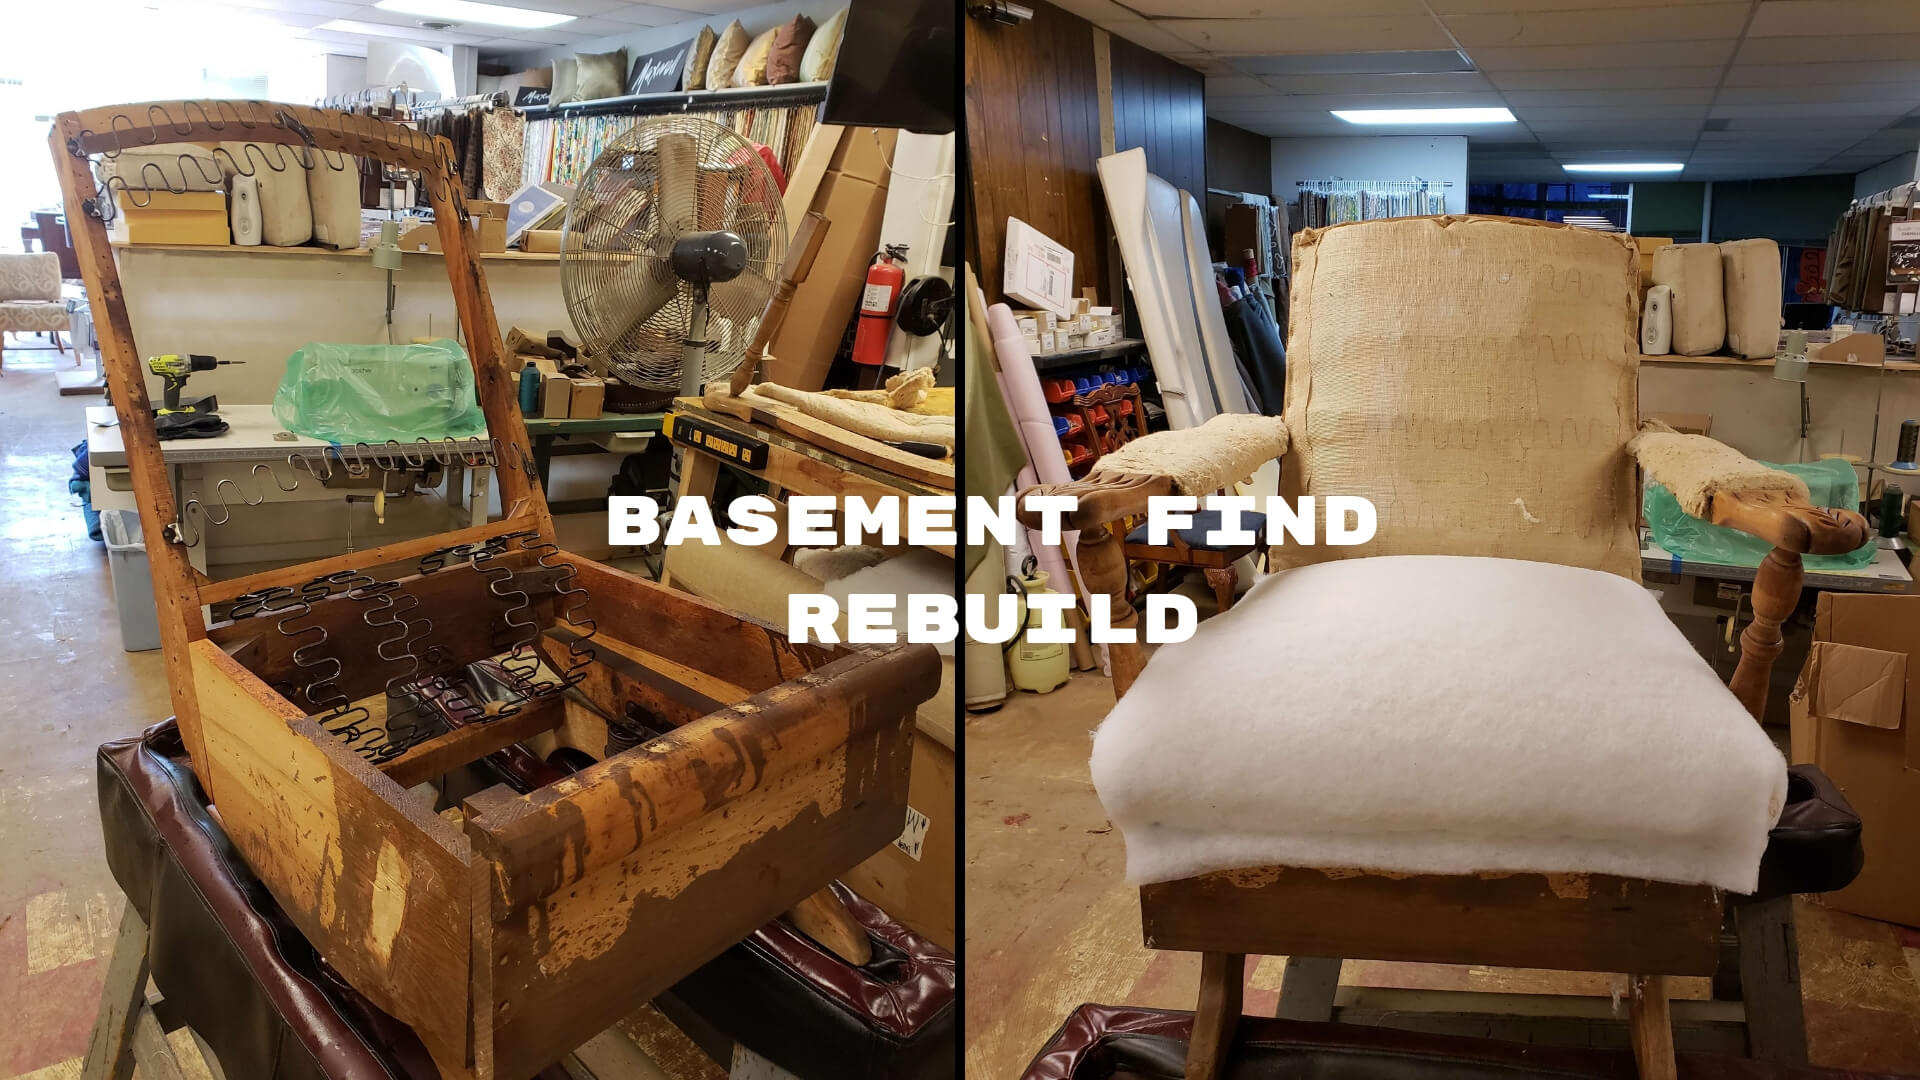
We start the restoration by first stripping the platform rocker to the frame. Taking off all the old fabric, cotton padding and the burlap. Once we are down to the just the solid wood frame. We disconnect the seat springs. So we can re-glue the main structure of the chair. Making sure the platform rocker will last another 70 years.

Now that the frame is re-glued. We attach new E. K. Clips ( clips that hold the springs in place.) Attach the seat springs. Then attach the back springs and replacing any E.K. clips that are broken. Re-building the chair like it was manufactured 70 years ago. The frame is almost ready to be upholstered. Before we can upholster, we sand and clean the wood, The client likes the look of the lighter wood so we just clear coat the wood with an acrylic finish so the wood is the natural color. The frame is solid, the arms and base are cleaned and finished. Now we begin to upholster.  New burlap is stapled over the seat and the inside back of the chair. The seat cushion is put back on the chair. This original seat cushion is comprised of straw, horse hair and cotton. By reusing the original cushion verse buying new foam. The original cushion will not break down like the foam cushion. Most foam breaks down between 7 to 12 years. We do however add more cotton to the original cushion making it more comfortable. Then we add 1/2 inch Dacron over the cotton making it even more plush. The seat is upholstered first, Then the arms are upholstered. The inside back of the rocker in now upholstered. only thing left to upholster is the front band of the chair and the outside back. ( The front band is the front of the chair under the cushion.)  We put new dacron and cotton on the front of the chair then the fabric. The outside back we apply dacron so the chair is padded and then we staple the fabric.

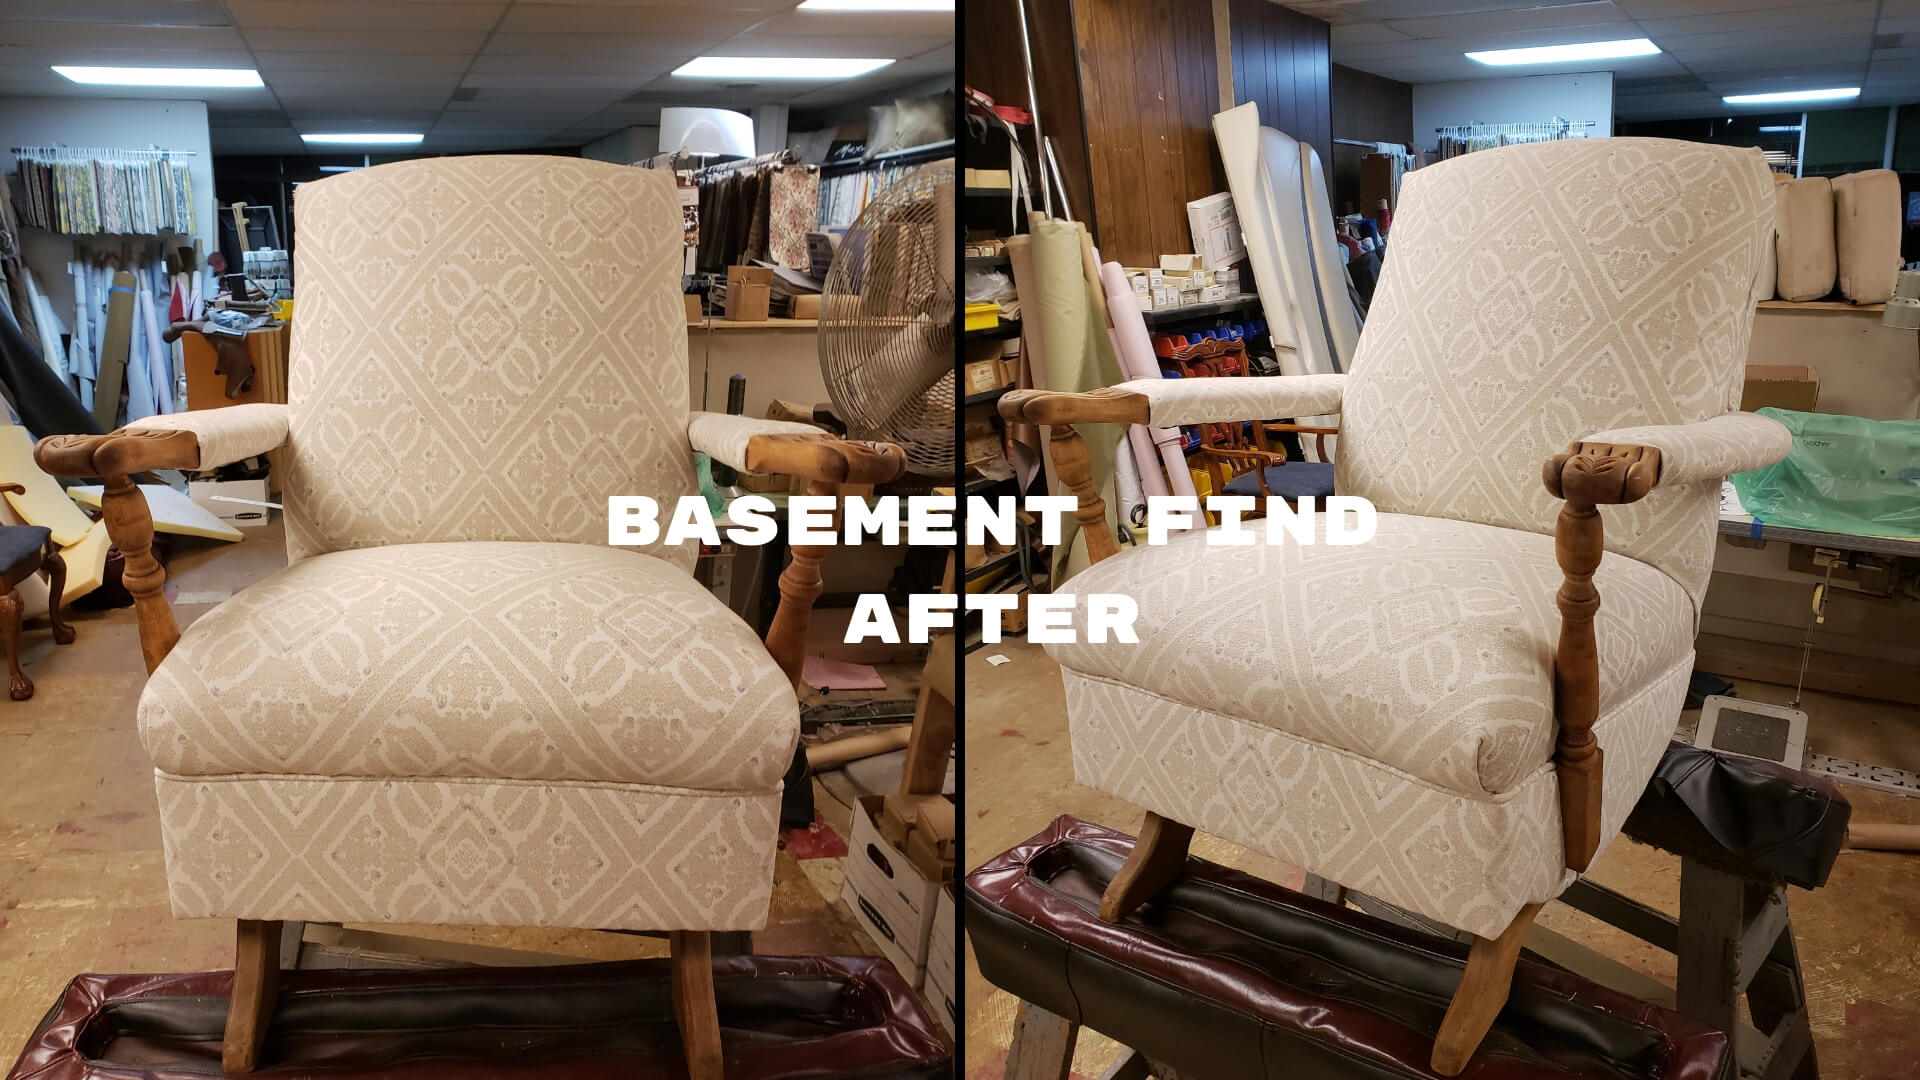
The chair is now completely restored.

Now this 70 year old platform rocker will be used and enjoyed for another 70 years.

Originally posted on August 23, 2021 @ 4:02 am

Loveseat Collapsed Arms

Loveseat Collapsed Arms

Loveseat Collapsed Arm Repair

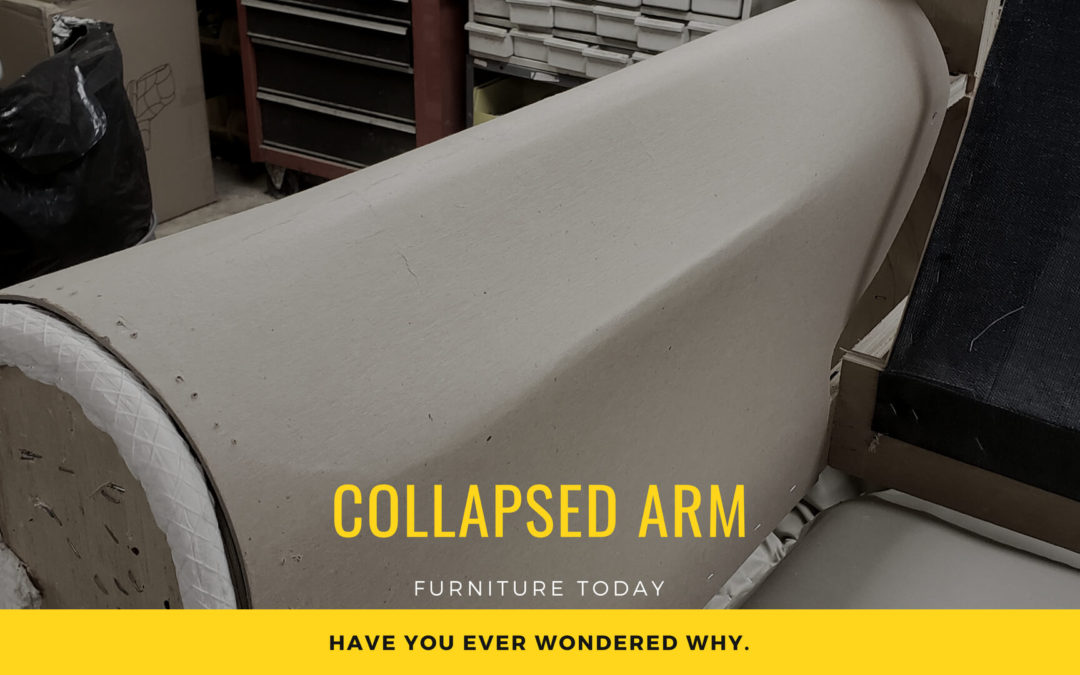
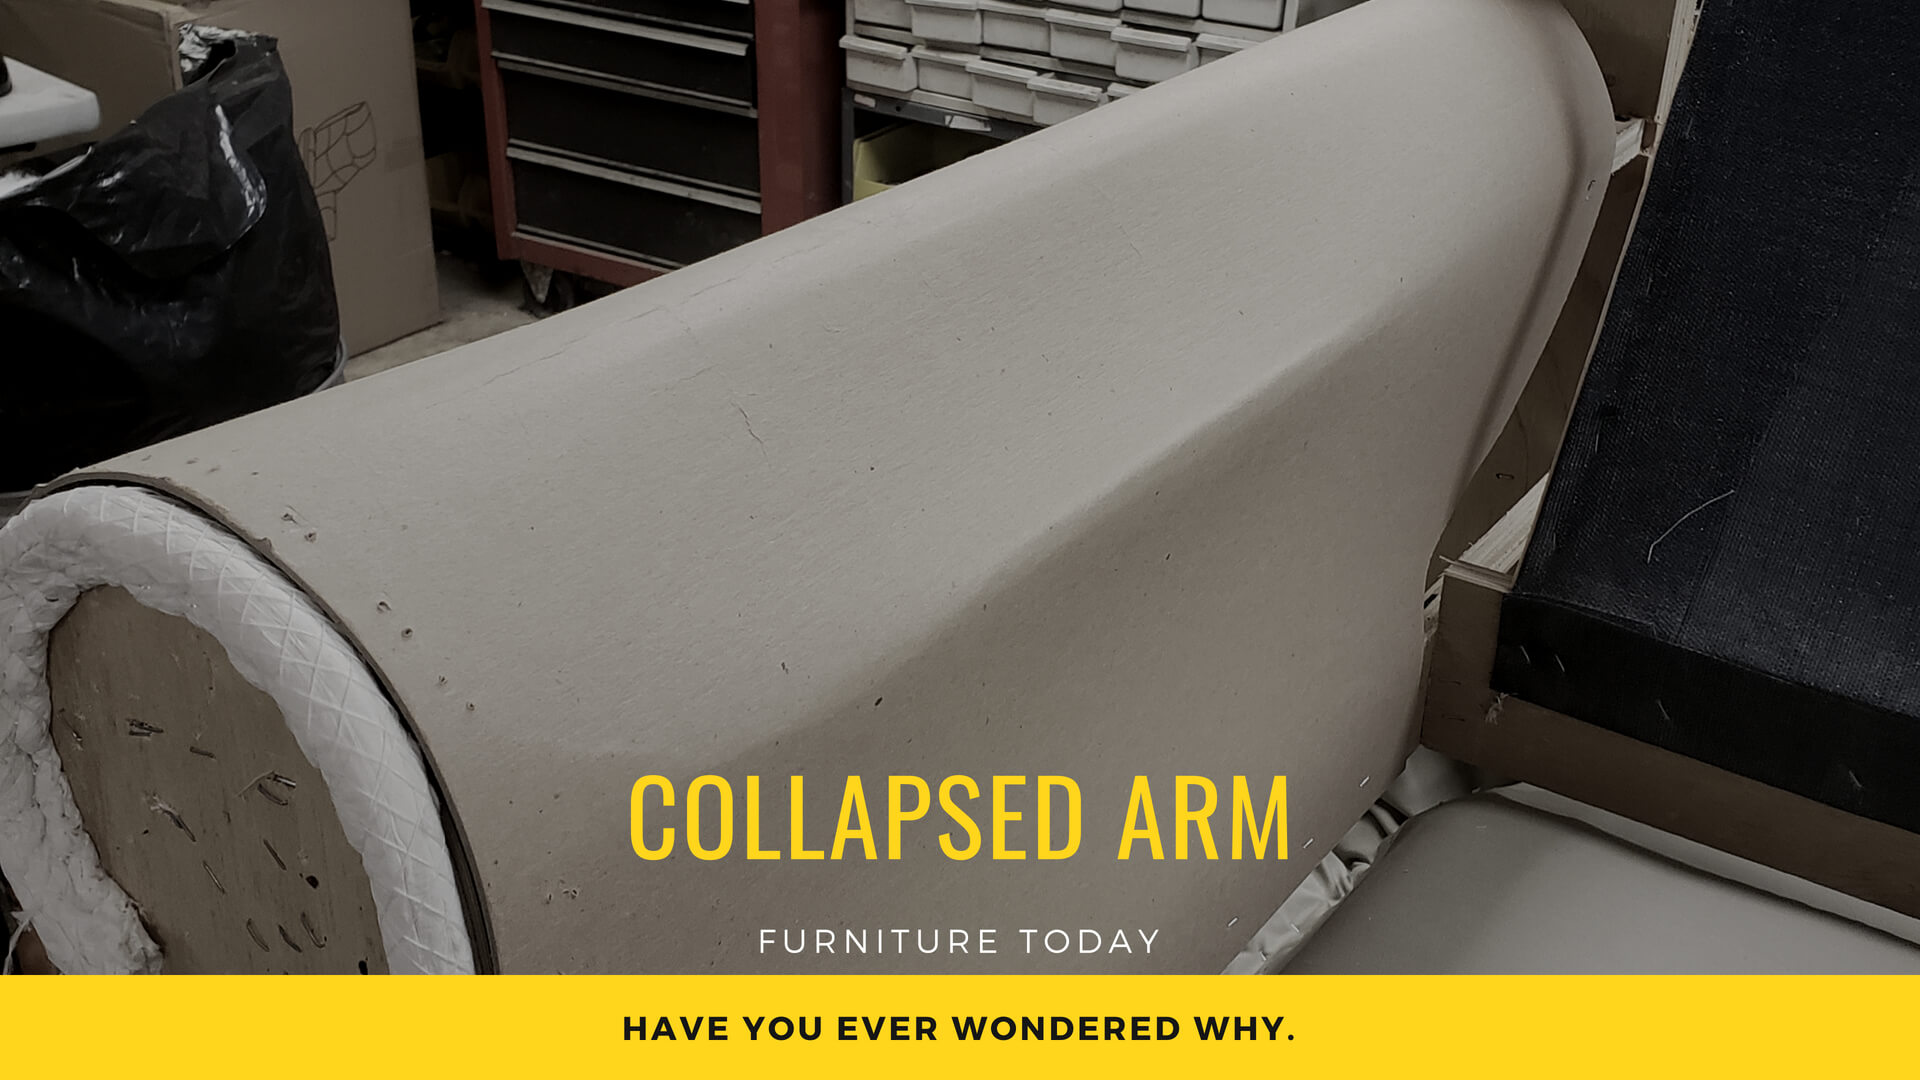
Here is an example of a love seat with collapsed arms. Collapsed arms on chairs and couches is becoming more prevalent in the furniture business these days. A collapsed arm happens due to substandard materials being used in the manufacturing process, such as cardboard in the loveseat picture below. Have you ever wondered why?

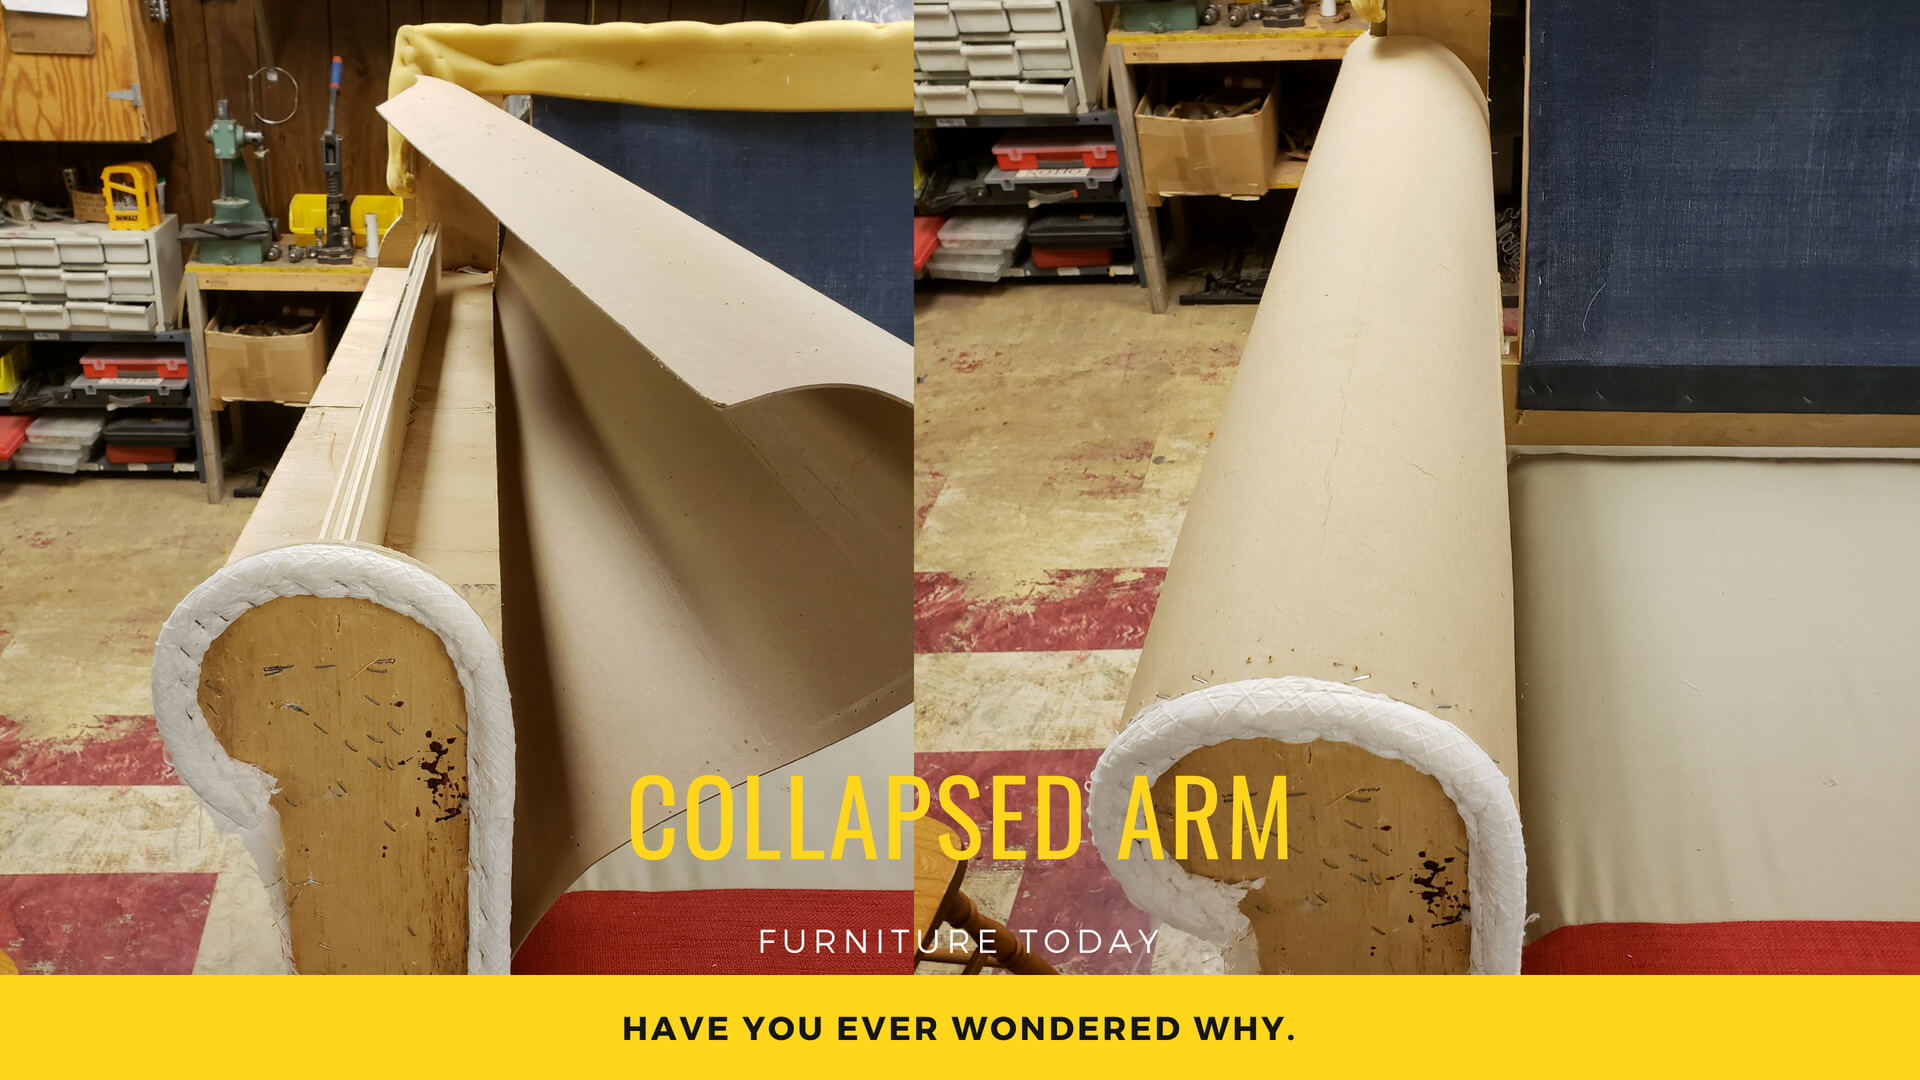
As you can see in the picture below, we pulled back the cardboard to reveal a voided space in the construction of the loveseat. The only support for the arms of the loveseat, is a piece of plywood placed vertically within the arm, with voids to the right and left of the plywood. The arms of this loveseat can only support the weight of what the cardboard can hold.

Let’s talk about how we fix this type of poor design at The Furniture Specialist. First, we remove the fabric or leather carefully from the furniture. We make every effort to be able to reuse the fabric or leather that is currently there. Underneath the fabric or leather, there is foam padding and Dacron. We remove the padding and Dacron to expose the cardboard. We lift the cardboard up from the arm of the chair, then place foam in the voids of the arm assembly. We reattach the cardboard, then reassemble the Dacron and foam padding. If the Dacron is worn out or torn, the Dacron is replaced. At the end, we put the fabric or leather back in place, and we’ve finished the project.

The time it takes to make a repair of this nature can range from 2-3 hours, and our customers are much happier to continue having the furniture they currently love, rather than having to replace the furniture piece in their homes.

Do you have an armchair, loveseat, or couch needing this type of repair? We would love the opportunity to help you with a project of this type. Give us a call, and we schedule an appointment to pick your furniture up.

Originally posted on August 19, 2021 @ 10:09 pm

Does Your Furniture Have Cheap Plastic Spring Clips?

Does Your Furniture Have Cheap Plastic Spring Clips?

Does Your Furniture Have Cheap Plastic Spring Clips?

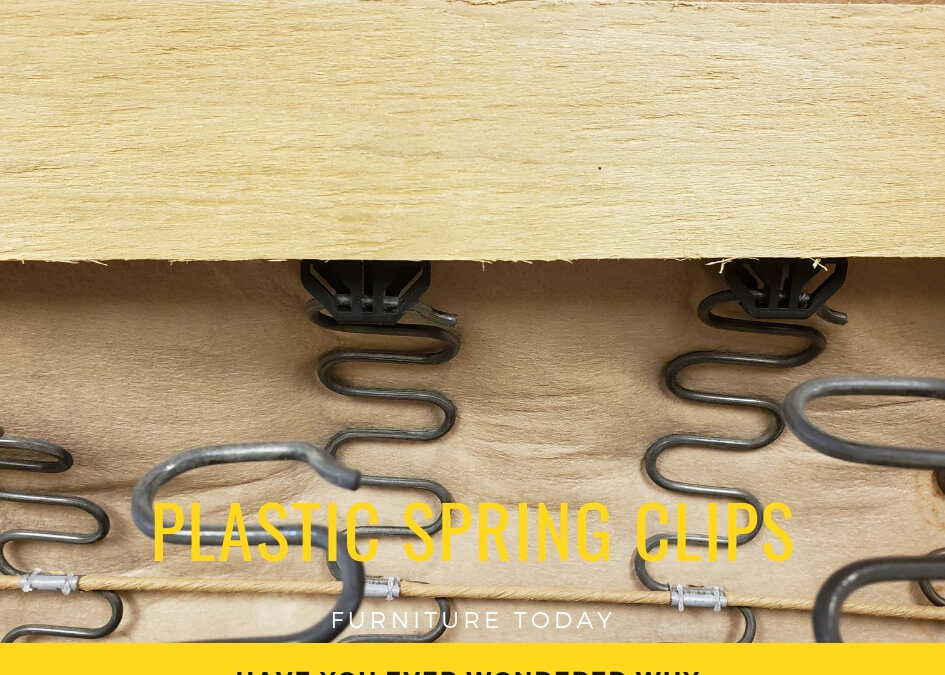
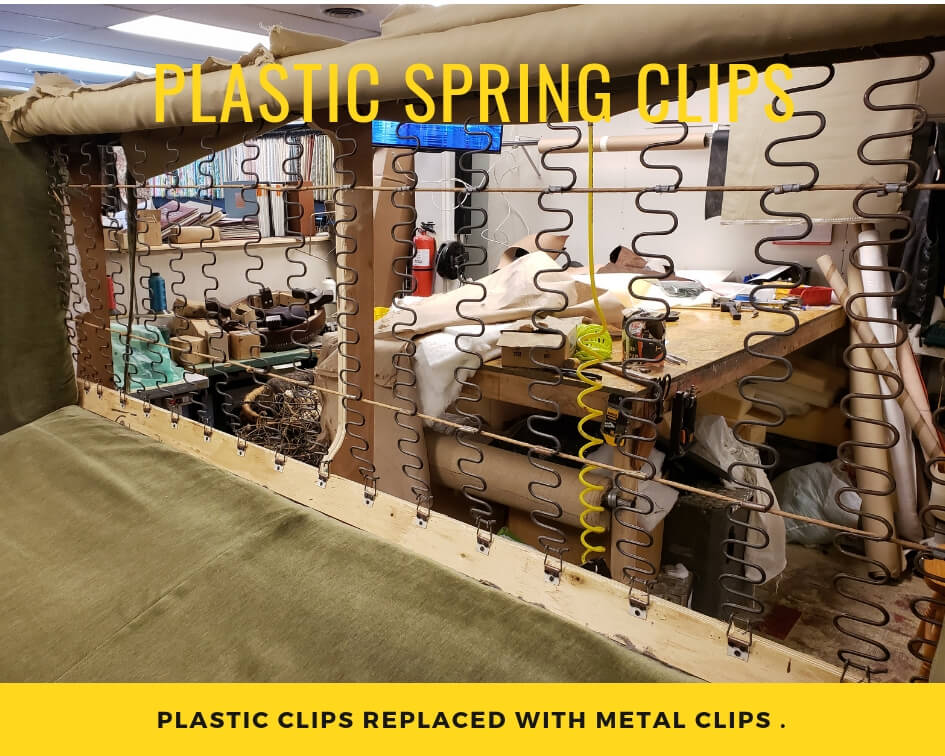
We are finding some manufacturers are cutting corners by using cheap plastic spring clips. This article discusses the differences between spring clips. Plastic clips versus metal E.K Clips.

We will also be removing the plastic clips and replacing with Metal E.K. Clips.


The photo above shows a strip of plastic spring clips, on the bottom left of the picture. As you can see, some of the clips have broken off. Instead of just cutting off the section where the clips broke off and repairing just the broken ones with metal clips, we are taking off the whole strip of plastic clips. We have repaired these sofa’s in the past, and have noticed after about 7 years the plastic starts to become brittle then breaks. If we just repaired the broken ones and leaving the plastic clips that are still attached, the plastic spring clips will eventually break and we would have to replace them. So we remove all the plastic spring clips and replace them all with metal ones. When we repair our customers furniture we want it to last. We’ve noticed over the past few years, a lot of furniture manufacturers have been cutting corners in their manufacturing process, in an effort to produce their products at a lower cost.
As you can see in the above photo. We removed the cheap plastic spring clip strips and replace it with Metal E.K Clips. ( E.K Clips are metal clips that attach springs to the wood.)

After the Clips have been replaced, we proceed to put everything back together. First, the sheet of batting over the springs. Then we pull the decking tight and staple it down. (The decking is the fabric that you see when you pull your cushions off.)

The Sofa is now repaired. Are you in need of a repair similar to this? We would love to help you out.

Originally posted on July 17, 2021 @ 3:10 pm

Wood Scratch Repair – How To Repair Surface Scratches On Wood Furniture

Wood Scratch Repair – How To Repair Surface Scratches On Wood Furniture

[lwptoc]

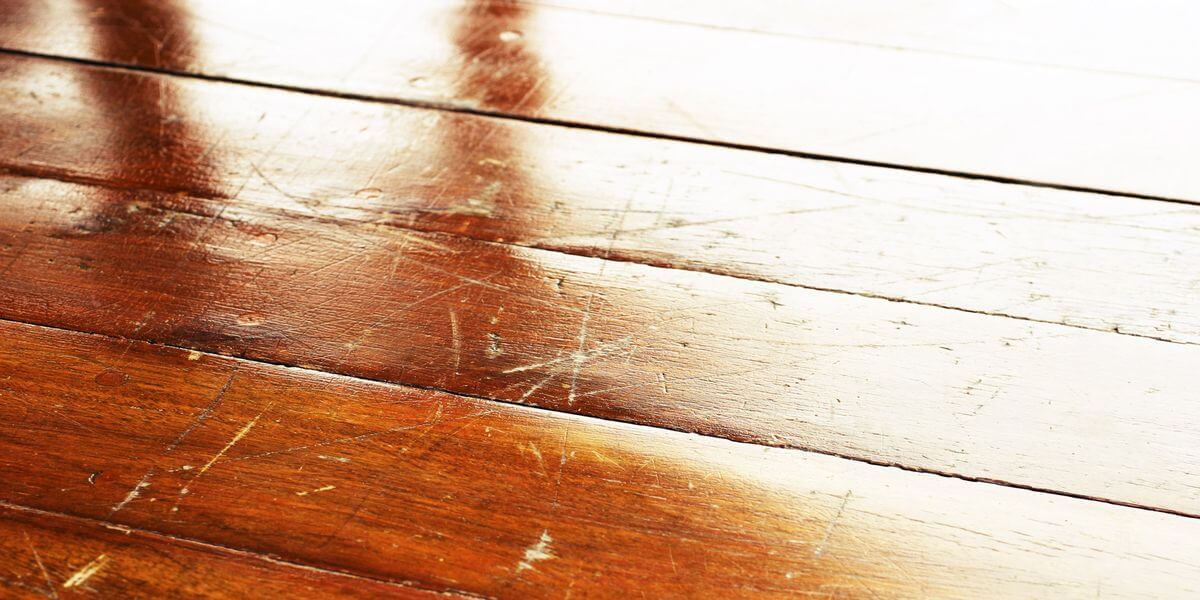
We all know how frequently the dining table is used in the house – from daily family dinners to youngsters doing their homework – so it’s no wonder that your dining table will soon start exhibiting signs of wear and tear. Hence our article about wood scratch repair. These are sometimes inevitable, but here are some simple DIY techniques and tactics to keep your hardwood table looking brand new. These guidelines apply to the table as well as any associated benches or seats.

How to Use Sandpaper to Remove Scratches From Wood Furniture

Here are some basic techniques for wood scratch repair or damaged spots on your dining table:

  1. The majority of mild or surface scratches may be eliminated by softly sanding the affected area using a sanding sponge or sanding block. Sand in the direction of the grain at all times. Because sandpaper leaves scratches on your table, the lower the grain (80, 120), the rougher the paper and the deeper the marks. By following the grain of the wood, the scratches merge in with the natural grain. If you go against the grain, the scratches will stick out rather than blend in.
  2. Light scratches can be erased by first using fine sandpaper (180 grit) and then blending in and minimizing the scratches created by the 180 grit. If the scratches are deeper, you may want to use a medium grain sandpaper (120 grit) before proceeding with this step.
  3. Finish by sanding the area with finer grit sandpaper (240 grit) in the direction of the grain to blend in and eliminate the scratches created by the lower grit paper. You should never go from coarse sandpaper (120 grit) to fine sandpaper (240 grit) since you will see the scratch marks from the coarse paper.

After you’ve removed the scratch or blemish, be sure to wipe all of the dust off the dining table before repairing it using the oiling or waxing methods described in ‘how to oil your dining table.’
When it comes to extremely minor wood scratch repair, sandpaper isn’t always necessary; you may get rid of them using common household products.

how to use sandpaper to remove scratches from wood furniture

How to Remove Scratches From Wood Furniture Using Vinegar

You will require the following items to complete this task:

  • White vinegar (Cider vinegar will also work)
  • Olive oil
  • Two soiled cotton rags

Why do we advocate white vinegar?

White vinegar is generally made up of 5% acetic acid and 95% water. These qualities not only make it an excellent cleaning solution for wood scratch repair, but they also aid in the healing of small scratches. The acetic acid will work into the existing finish surrounding the scratch to help fill it.

Why do we suggest olive oil?

To heal minor scratches, use a stronger solution of white vinegar than you would for cleaning your table. It is critical to combine the white vinegar with the oil since too much acetic acid can harm the tabletop surface. As the olive oil soaks into the exposed wood within the scratch, it will also improve the overall intended effect. This helps to produce a deeper color that matches the remainder of the finish while also preserving the wood from moisture. Finally, olive oil is a natural substance that is food safe, making it ideal for use on a surface that you eat from.

Nonetheless, we highly advise you to always apply a solution to a tiny test area first to ensure that it does not harm the top finish.

Here’s a fast 5-step method for wood scratch repair with vinegar:

  1. In a dish or cup, combine 100ml (one part) white vinegar and 200ml (two parts) olive oil and whisk thoroughly.
  2. Dip a delicate cotton cloth into the cup, allowing the solution to soak into it. Squeeze the rag so that no extra moisture drips from it.
  3. Apply the wet rag to the scratched area of your tabletop. After rubbing the scratched area in a circular motion, finish by rubbing the cloth with the grain.
  4. Allow the solution to rest on the tabletop for 2 minutes. This enables the oil to penetrate the scratches.
  5. Wipe away the excess solution with a clean, fresh cloth. Then massage it against the grain. Check that there is no residue on the surface.

This procedure can be done as many times as necessary until the scratches are removed. If your scratches do not appear to be disappearing, it is possible that they are too deep. If your scratches are too deep, scroll down to the following section to learn how to erase deeper marks with crayons.

how to use crayons to remove scratches from wood furniture

How to Use Crayons to Remove Scratches From Wood Furniture

Use a child’s crayon to erase scratches that are somewhat deeper and cannot be cleaned with vinegar. Here are three reasons why a crayon is an excellent tool for wood scratch repair:

  • Strength- A crayon is produced from a specific blend of waxes. These waxes have a strengthener added to them to guarantee structural strength and crayon keep together nicely. As a result, once they’ve filled the little gap or scratch on your table, they’ll solidify like the rest of the wood.
  • Color selection- Crayons come in a range of colors, making it very simple to select the ideal combination. We’ve selected the closest wood colors from the Crayola collection for you. Crayola crayons in ‘Bisque’ and ‘Gold’ are recommended for natural wood color tables. Crayola crayons in ‘Light Brown’ and ‘Golden Beige’ are recommended for medium brown wood tables. Finally, we recommend ‘Fuzzy Wuzzy’ and ‘Earth Tone’ Crayola crayons for dark wood tables. If you’re not sure what color crayon to use, we recommend going darker than the real wood color of your table to achieve the most natural effect.
  • Food security- Crayons are designed to be safe for children to use, yet young children like putting things in their mouths. Because the colors in the crayons are non-toxic, they are safe to use on your dining table.

Now that you know why crayons are wonderful for wood scratch repair, follow these five simple steps to accomplish it:

  1. Make sure your table is clean and clear of dust and dirt, particularly around the area you want to fix. If the surface isn’t clean, the wax’s adherence to the wood will suffer.
  2. Choose a crayon color that complements the wood color of your dining table. We recommend that you choose a deeper color rather than a lighter one, since this will help the repair fit in with the rest of the wood.
  3. Rub the crayon over the scratched area in both directions until the scratch is completely filled with wax.
  4. Scrape any extra wax from the table with a credit card. Check that the table top is now level where the scratch was.
  5. Buff the wax infill with a clean cotton swab to help it integrate into the surface.

This technique can be repeated as needed to produce a smooth and level surface. However, the scratches or voids may be too deep and broad to be removed using the procedure described above. If that’s the case, continue reading.

How to Repair Deep Scratches in Wooden Tables

  1. To fill in the deep scratch, use a specialized wood filler that matches the color of your table. You may massage it into the scrape with your finger, making sure there are no gaps of air.
  2. Smooth the surface and remove any extra wood filler from the table with a putty knife or an old credit card.
  3. Wait for the filling to dry — drying durations might vary, so read the box for exact drying times.
  4. On the dry area around the scratch, use fine sandpaper (180 grit or 240 grit). Always sand in the direction of the grain of the wood.
  5. Using the methods outlined above, apply the appropriate oil or wax.
how to get ink out of a wooden table

Repairing Other Wooden Table Issues

The dining table is proven to be a versatile piece of furniture in the present atmosphere. It may be used for dining meals, as a home office desk for people who work from home, as a school classroom for the kids, or for practicing your arts and crafts abilities. This exposes your wooden table to a broad range of potential damages; nevertheless, there are numerous strategies and methods you can employ to protect your table’s health.

How to Get Ink Out of a Wooden Table

A dining table is an ideal location for home work and learning. However, getting ink on the surface of your dining table is a typical issue that is likely to occur.

Before we propose the ink removal method, it’s vital to note that the effectiveness of the process is dependent on how your dining table is finished. If your wooden dining table has a wax or oil finish, removing the ink can be much more difficult — the procedures following will most certainly peel the wax and oil from the ink area, requiring the area to be re-oiled/waxed. If the biro has pierced the wood, read the section ‘how to remove scratches from wood furniture with sandpaper’ and restore your table using the same method.

Varnish and lacquer finishes coat the top surface of the wood with a thick protective coating. This implies that the ink is less likely to have entered the wood, making it easier to remove.

We recommend squeezing some rubbing alcohol or even hand sanitizer on the ink stains and letting them rest for 10 minutes. If the ink appears to be caught inside the grain of a hardwood table, it is recommended to rub over the ink in circular motions using a cotton ball or cloth to assist penetrate the trapped ink.

Ensure that the table has been cleaned clean and that no alcohol remains on the table. If there are any ink residues on the table, repeat this step.

How to Get Rid of Water Stains on a Wooden Table

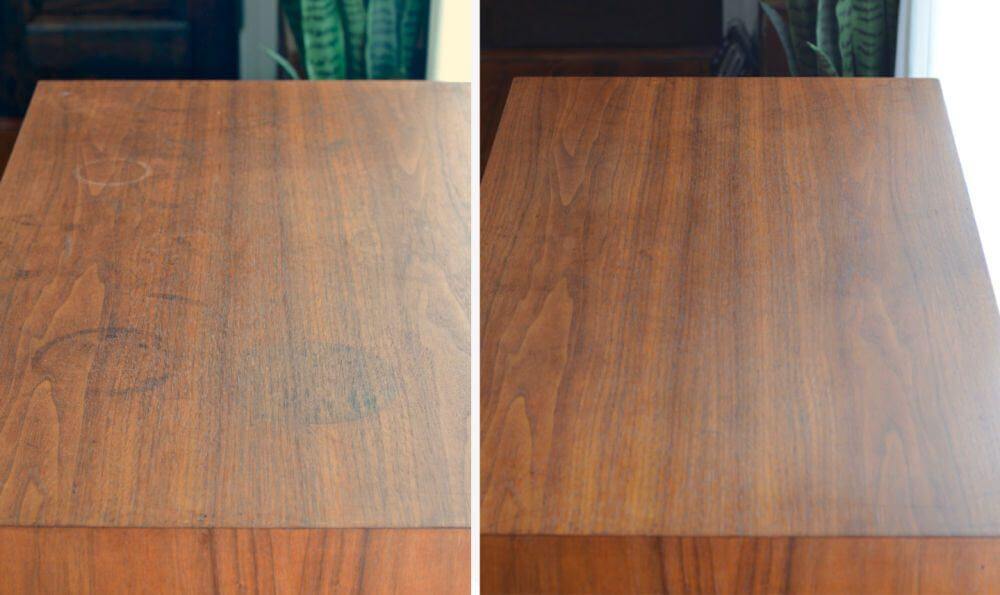
Nothing sticks out more than a white water stain on a dining table. Water stains are frequently in the shape of white rings since the primary culprit is the bottom of cold glasses or hot mugs placed immediately on top of a hardwood table. However, they are not necessarily in the form of a ring because any cold or hot item, such as hot serving dishes or dropped drinks and food, can leave markings. The hazy look of the white markings is caused by water trapped on the table’s surface finish. This is caused by either condensation from cold objects or steam from heated items.

It is crucial to notice that if your watermark is not white but rather a dark brown or black color, this indicates that water has penetrated through the finish of your table and caused damage to the wood itself. This is typically repairable by sanding the area down and re-applying a protective finish, but it depends on how deep the damage is into the wood. Follow the instructions in this article to learn how to remove scratches from wood furniture with sandpaper.

If your table has white hazy watermarks, the best thing you can do is try to remove the trapped water in the top finish. The simplest method is to use a hairdryer or heat gun to evaporate the water, allowing it to exit through the finish. Here are some easy measures to take to guarantee you remove the stains properly and without further harming your table:

  1. Set your hair dryer on a medium to high heat setting.
  2. Move it side to side over the soiled area while holding it around 10cm away from your tabletop. You should not smell any burning – if you do, reduce the heat or move away from the surface.
  3. After around 2-3 minutes, the stain should begin to disappear.
  4. Keep it on the affected area for 15-20 minutes, or until the stain has completely vanished.

If the watermark has been on the table for some time, it may not be entirely removed. We recommend that you now proceed with this step by putting a spoonful of Mayonnaise to the affected region and covering it with a kitchen towel overnight. Although it may appear strange, mayonnaise is made up of a combination of oil and vinegar. The oil will gently soak into the wood overnight, restoring the color of the table, while the vinegar contains acetic acid, which helps break down the surrounding finish, enabling the repaired area to blend in with the existing finish.

Overall, these tips and methods should help you safeguard your dining table from water stains.

how to get rid of water stains on a wooden table

How to Keep Water Rings Off a Wooden Table

Unfortunately, if you’re reading this, you’ve probably already seen water rings on your hardwood table. Here are a few of our best suggestions for avoiding water rings on a hardwood table in the future:

  1. You should avoid placing both cold and hot liquids straight on your hardwood table. You must protect your table from dampness and heat, therefore keep your coasters close at hand or on your table while not in use.
  2. Instead of placing hot or cold plates or serving dishes on on your table, use a placemat to preserve it.
  3. Wipe up spills as soon as you detect them on your table.
  4. Don’t let your table air dry after washing it. Use a dry towel to ensure that all wetness is wiped from the table as soon as possible.

You must take care of your wooden table if you want it to last in your house. Read our thorough guide on keeping your wooden table for more information on how to care for it. You might also be interested in our guide on caring for and treating oak furniture.

Originally posted on September 28, 2021 @ 10:11 pm

Powered by WordPress | Designed by Agency Hacker

Pin It on Pinterest